

Highlighting text can streamline your editing workflow by flagging terms that may need special attention. This month’s macro simplifies the process of adding and removing highlighting without cluttering your document with unnecessary tracking.
Registration for the next Word Macros A to Z class closes soon, with discounts available for EFA, IPEd, Editors Canada, CIEP, and PEG members. If you’ve been considering signing up, this will be your last chance for 2025.

This Month’s Macro – HighlightAddRemove
While editing, you may come across terms that you want to review later, such as facts that need checking or questionable word choices. You might also want to highlight text for the author to review. HighlightAddRemove highlights these items in your choice of color, such as yellow, turquoise, green, or pink. You continue running the macro until it reaches your preferred color. It will also remove highlighting. In addition to efficiently applying highlighting, the macro does not track these formatting changes.
How It Works
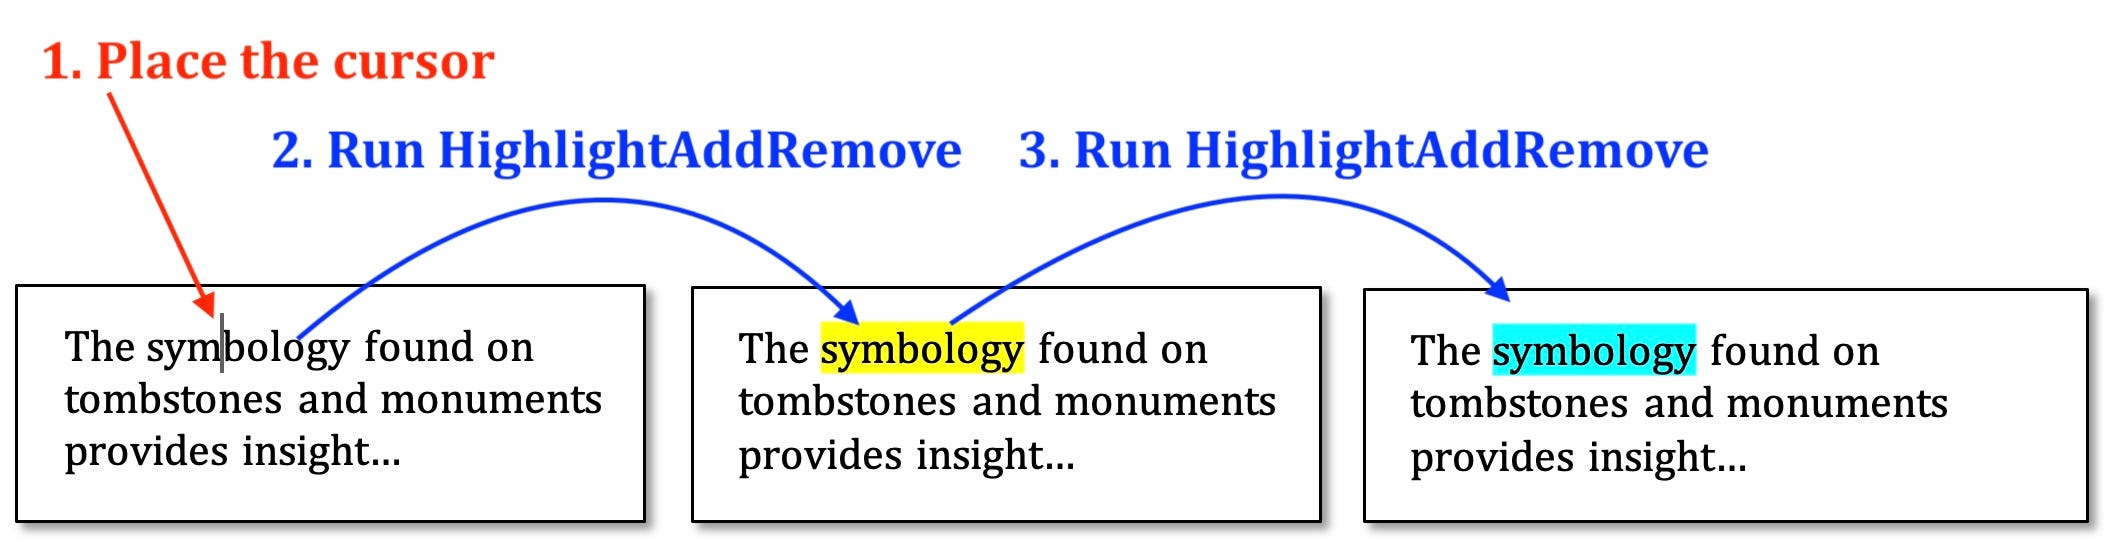
To highlight or unhighlight a single word:
Place the cursor inside the word.
Run HighlightAddRemove repeatedly until it applies your desired highlighting color or removes the existing highlighting.
To highlight or unhighlight multiple words:
Select the words you want to highlight.
Run HighlightAddRemove repeatedly until it applies your desired highlighting color or removes the existing highlighting.
Download the code:
Customize the code
You can change the order in which the macro applies the colors.
Open Visual Basic and locate the code for HighlightAddRemove.
Find the lines of code near the top that read:
myCol(1) = wdYellow
myCol(2) = wdTurquoise
myCol(3) = wdPink
myCol(4) = wdBrightGreen
myCol(5) = -1
Change the order of the colors by adjusting the number in parentheses after
myColand rearranging the lines to be in numerical order. For example, if you want it to apply green and then yellow, remove highlighting (indicated by -1), and then apply turquoise and finally pink, revise the code as follows:myCol(1) = wdBrightGreen
myCol(2) = wdYellow
myCol(3) = -1
myCol(4) = wdTurquoise
myCol(5) = wdPinkYou can add more color options. The other readable highlighting colors are red (wdRed), 25% gray (wdGray25), and 50% gray (wdGray50). Add a
myColline for each new color and insert the next number in the sequence along with itswdcode. For instance, to add 25% gray and 50% gray as the sixth and seventh colors, add the following lines to the code:
myCol(6) = wdGray25
myCol(7) = wdGray50
Related macros
These two macros systematically apply highlighting, which you can use HighlightAddRemove to remove:
HighlightSame: Highlights a term throughout a document (such as an overused, misused, or inconsistently treated term) to ensure you review each instance
HighlightWordList: Highlights a list of words in a document (such as easily confused terms and client spelling preferences) to draw your attention as you are editing

Word Macros A to Z – Registration closes soon
Want to master macros like HighlightAddRemove that make your editing process more efficient? Over six weeks, the Word Macros A to Z course helps you build essential macro skills through video tutorials, hands-on exercises, and live Q&A sessions and leaves you with a select group of macros ideal to support the way you work. The course is designed for both PC and Mac users, whether you are new to macros or looking to expand your skills. Click here for a detailed course description and outline.
“I enjoyed being able to work through the course at my own pace while still having regular access to the instructor. I was learning valuable things each week that I could employ at work right away.” —Past participant
Register here. Members of EFA, CIEP, IPEd, PEG, and Editors Canada qualify for discounted rates through their organizations.
Have a question or want to suggest a macro for a future newsletter? Reply to this email and let me know.
Happy macroing,
Jennifer
ps: Don’t forget to back up your macros.